

Recipe
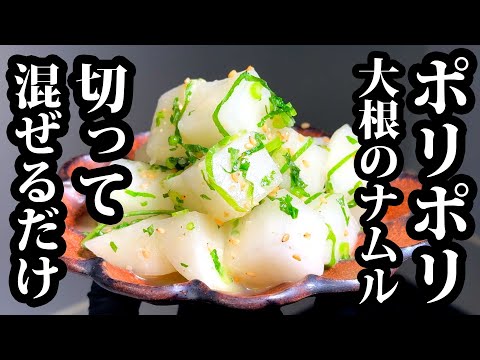
A Chef of 20 Years Teaches a Lifetime Side Dish: Addictive Daikon Radish Namul [Too Easy]
Ingredients
- Daikonradish: 1/2 (approx. 650g)
- Daikonradish leaves: Only if fresh
- Choppedgreen onions: 1 tbsp
- Shisoleaves: 5
- Salt:1 tbsp
- Sugar:1 tsp
- Groundsesame seeds: 1 tsp
- Whitesesame seeds: 1 tsp
- Ajinomoto(MSG): A pinch
- Grainvinegar: 4 tsp
- Sesameoil: 1 tbsp
- Gratedgarlic: 1 tsp
About "Addictive Daikon Radish Namul"
A lifetime prep-ahead side dish recipe by Chef Kosei, who has 21 years of experience. This Addictive Daikon Radish Namul uses different parts of the daikon, draws out moisture via salt-massaging (osmotic pressure) to let flavors soak in, and highlights the aromas of fresh garlic and shiso leaves. Featuring a delightfully crunchy texture and a punchy kick of sesame oil and garlic, it becomes even more flavorful after resting in the fridge for 1 to 2 days.
Introduction to 飲食店独立学校 /こうせい校長 →
Tips for Making "Addictive Daikon Radish Namul"
-
Selecting Daikon
- Daikon sections have different characteristics. The top is sweet and best raw, while the bottom is pungent and best for pickles. This recipe uses the top section.
-
Selecting Daikon
- A good daikon has rootlet holes aligned in a straight line. Twisting indicates growth stress, resulting in less moisture and sweetness.
-
Prep
- Peeling the skin thickly removes the pungent isothiocyanate, gets rid of tough fibers, and coaxes out sweetness.
-
Prep
- Roll shiso leaves loosely before julienning to avoid crushing the fibers, maximizing their refreshing aroma.
-
Seasoning
- Salt-massaging uses osmotic pressure to remove excess water. This helps seasonings penetrate and mellows pungency and bitterness.
-
Seasoning
- Add green onions and shiso at the end. Mixing them with seasonings for too long crushes their fibers and dulls their color.
Ingredients for "Addictive Daikon Radish Namul"
12 items* Tap ingredient names to find on Amazon
How to Make "Addictive Daikon Radish Namul"
- 1
Checking Daikon Parts and Peeling
Use the top part of the daikon (which is sweet and juicy). Choose one where the rootlet holes are aligned in a straight line. After washing and patting dry, peel the skin thickly along the line between the skin and the flesh. This removes the pungent compound isothiocyanate, gets rid of tough fibers, and coaxes out the sweetness.
- 2
Cutting the Daikon
Cut the peeled daikon into 2.5 to 3 cm cubes and transfer them to a bowl. Cut them into relatively large pieces to ensure a satisfying bite and great texture.
- 3
Preparing the Daikon Leaves
If the daikon leaves are fresh and crisp, use them. Thoroughly wash away any dirt or insects from the base, remove any damaged parts, chop finely, and add to the bowl with the daikon.
- 4
Salt-Massaging
Add 1 tbsp of salt to the bowl and thoroughly massage it into the daikon and leaves. Osmotic pressure will draw out excess moisture, making it easier for the seasoning liquid to penetrate, mellowing any pungency or bitterness, and improving the texture. Cover with plastic wrap and let sit for 20 minutes.
- 5
Prepping the Shiso Leaves
Wash 5 shiso leaves, pat dry, and cut off the stems. Stack the leaves, roll them up loosely, and finely julienne them from one end. Rolling them gently prevents crushing the fibers, preserving their refreshing aroma. Lightly loosen the cut shiso and set aside in a small bowl.
- 6
Squeezing Out Moisture
After 20 minutes, a large amount of water will have been drawn out of the daikon due to osmotic pressure. Drain thoroughly using a strainer, then return the daikon to the bowl.
- 7
Tossing with Seasonings
Add 1 tsp sugar, a pinch of Ajinomoto (MSG), 1 tsp ground sesame seeds, 1 tsp white sesame seeds, 4 tsp grain vinegar, 1 tbsp sesame oil, and 1 tsp grated garlic to the daikon. If you mix the green onions and shiso too much from the start, their fibers will break down and lose their vibrant color, so toss thoroughly with just the seasonings first.
- 8
Finishing Touches
Once everything is evenly mixed, add the julienned shiso leaves and toss lightly. Taste and adjust if necessary. Letting it rest in the refrigerator for 1 to 2 days allows the flavors to meld further, resulting in a deeper taste.
Food Science
By drawing out excess water from the daikon through osmotic pressure during salt-massaging, you create a delightfully crisp texture and allow the seasonings to penetrate deeply without being diluted. Furthermore, combining the sweetness of sugar, the acidity of grain vinegar, and saltiness with the umami of Ajinomoto (glutamic acid) balances the basic tastes, resulting in a deep, complex flavor that you will never tire of.
Detailed Commentary on "Addictive Daikon Radish Namul"
* Content organized by topics from the video.
A Lifetime Side Dish! Daikon Radish Namul
Chef Kosei, with 21 years of culinary experience and 15 years running restaurants, introduces his ultra-easy Addictive Daikon Radish Namul as a 'lifetime prep-ahead side dish.' This recipe is incredibly delicious, featuring a crunchy texture that is so addictive you won't be able to stop eating it. Keeping a batch stocked in the fridge is incredibly convenient for daily meals or as a quick bar snack. The video kicks off with Kosei's energetic greeting and high-spirited personality, creating a bright and fun cooking atmosphere. The culinary pro explains how to make this simple yet authentic-tasting namul in an easy-to-understand manner, sharing useful tips like how to choose the right daikon and prep secrets.
Ingredients and Selection Tips
The ingredients for this recipe are 1/2 daikon radish (approx. 650g), 1 tbsp chopped green onions, 5 shiso leaves, 1 tbsp salt, 1 tsp sugar, 1 tsp ground sesame seeds, 1 tsp white sesame seeds, a pinch of Ajinomoto (MSG), 4 tsp grain vinegar, 1 tbsp sesame oil, and 1 tsp grated garlic. Chopped green onions are used as a substitute only if the daikon doesn't come with leaves; using pre-chopped ones saves time. For the grated garlic, using fresh garlic provides a vastly superior aroma, though it requires the effort of grating. On the other hand, using garlic paste from a tube is incredibly convenient and easy, even if the aroma is slightly less intense than fresh. Choose whichever option fits your mood and schedule.
Daikon Parts and Selection Guide
Daikon radish varies in flavor and moisture content depending on the section. The top section is juicy and sweet, making it perfect for raw dishes like salads. The middle section has a great balance of sweetness and pungency, ideal for cooked dishes like simmered stews. The bottom section is less watery and more pungent, which absorbs flavors easily and is great for pickles. Since we are eating this like a salad-style quick pickle, we use the less pungent top section. Additionally, a key tip for choosing a delicious daikon is to look for one where the rootlet holes are aligned in a straight line. Twisting in a daikon is caused by growth stress from hard soil or obstacles; a straight daikon grew with less stress, meaning it tends to be juicier and sweeter. When storing, cut off the leaves first, as they will otherwise draw moisture and nutrients away from the root.
Why We Peel Daikon Thickly and Cut It
After washing and patting the daikon dry, we peel it. If you look at a cross-section of a daikon from directly above, you can see a distinct line between the skin and the inner flesh; peeling thickly right along this line is a professional secret. There are four reasons for peeling it thickly: 1) to remove the pungent compound isothiocyanate located just beneath the skin, reducing bitterness and bringing out sweetness; 2) to remove tough fibers for a smoother mouthfeel; 3) to make it easier to cook tenderly and absorb flavors (in simmered dishes); and 4) to cleanly remove any surface blemishes or dirt. Once peeled, cut it into relatively large 2.5 to 3 cm cubes to ensure a satisfying bite and texture, then transfer them to a bowl.
Using Daikon Leaves and Salt-Massaging
If the daikon leaves are fresh and crisp, they make an excellent accent for color and texture, so chop them finely and use them. Since the base can trap dirt or insects, inspect and wash it thoroughly, discard any dried or damaged parts, chop finely, and add to the bowl with the daikon. Add 1 tbsp of salt and thoroughly salt-massage everything together. Salt-massaging has crucial scientific benefits: osmotic pressure draws out excess moisture from the cells, making it easier for the seasoning liquid to penetrate. It also softens the daikon slightly for a crisp yet smooth texture, while mellowing any pungency or bitterness. Furthermore, it establishes a base seasoning, helping the subsequent seasonings blend in evenly. Once massaged, cover with plastic wrap and let sit for 20 minutes.
Tips for Prepping Shiso and Garlic
While letting the daikon sit in the salt, prepare the aromatics. Wash 5 shiso leaves, pat dry thoroughly, and cut off the stems. Stack the leaves neatly, roll them up loosely to avoid crushing the fibers and losing their aroma, and finely julienne them from the end. This technique yields beautiful julienned strips while maximizing the refreshing scent of the shiso. Lightly loosen the cut shiso with your hands and set aside in a small bowl to make mixing easier later. Next, if using fresh garlic, peel it and carefully remove the germ/core, which can cause harshness and bitterness. These small, meticulous steps are the secret to elevating the final flavor to the next level.
Squeezing Out Water and Tossing
After 20 minutes, an astonishing amount of water is drawn out of the daikon due to osmotic pressure. Set up a strainer, drain the daikon and leaves thoroughly, and return them to the bowl. Seeing how much water pools in the bowl after just 20 minutes is a must-watch moment. To this, add 1 tsp sugar, a pinch of Ajinomoto (MSG), 1 tsp ground sesame seeds, 1 tsp white sesame seeds, 4 tsp grain vinegar, 1 tbsp sesame oil, and 1 tsp grated garlic. If you mix the green onions and shiso with the seasonings too early, their fibers will break down and lose their vibrant color, so toss the daikon thoroughly with just the seasonings first. Once evenly mixed, add the julienned shiso at the very end and toss lightly. Finally, Kosei tastes it with a serious expression to confirm the perfect finish.
Tasting the Addictive Daikon Namul
Plate the finished Addictive Daikon Radish Namul to serve. Taking a bite, the delightfully crunchy texture, savory aroma of sesame oil, punch of garlic, and refreshing accent of shiso spread through your mouth—it is so delicious you won't be able to stop eating. Chef Kosei can't help but exclaim, 'Delicious!' Despite the short marinating time, the salt-massaging ensures the flavors penetrate deep inside. This namul is also an excellent make-ahead dish, as letting it rest in the fridge for 1 to 2 days allows the flavors to meld and deepen even further. It is perfect as a bar snack or as a side dish for rice. It is incredibly easy to make, so please give it a try at home!
About 飲食店独立学校 /こうせい校長

飲食店独立学校 /こうせい校長
116万人 subscribers ・ 飲食店経営・家庭料理
* Opens YouTube channel
* Subscriber count is as of article creation and may differ from the current number.
