

Recipe
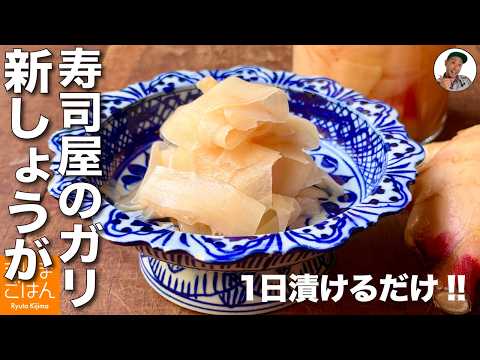
How to Make Pickled Young Ginger (Gari) | Authentic Recipe
Ingredients
- 200gyoung ginger
- 5cmkombu (kelp) for dashi
- 100mlwater (for sweet vinegar)
- 100mlvinegar
- 4tbsp sugar
- 2/3tsp salt
- Approx.600ml water (for boiling)
About "Pickled Young Ginger (Gari)"
This authentic pickled young ginger (gari) recipe is made by thinly slicing fresh young ginger, blanching it quickly, and pickling it in a sweet vinegar infused with kombu. It is ready to eat in just one day, and the flavor mellows and deepens after three days. This recipe covers detailed tips, including how to safely use a mandoline slicer and the precise boiling time needed to maintain a crisp texture. Perfect as a sushi accompaniment, a palate cleanser, a side dish, or a topping for cold shabu-shabu. It keeps in the refrigerator for several months, making it ideal to prepare in batches when young ginger is in season.
Introduction to きじまごはん 【料理家きじまりゅうた公式チャンネル】 →
Video Timestamps
Tips for Making "Pickled Young Ginger (Gari)"
-
Choosing a Pot
- Vinegar is highly acidic and can damage metal pots, so use an enamel pot or a non-stick pan.
-
Prep
- Always let the sweet vinegar cool to room temperature after boiling. Pickling ginger while hot ruins its texture. If in a hurry, cool it rapidly over ice water.
-
Prep
- Use a spoon (or a thin metal spoon) to peel young ginger thinly and cleanly. A knife will peel off too much flesh.
-
Slicing
- Slice the ginger parallel to the fibers (with the grain). Cutting across the grain makes the texture rough and unpleasant.
-
Mandoline Safety
- When using a mandoline, keep the flat side facing you and push forward using your thumb for stability. Hold with your fingernails when small, and slice remaining ends with a flat knife.
-
Boiling
- Boil the pink tips first for 10 seconds, then add the sliced ginger and boil for just 20 to 30 seconds while loosening with chopsticks. Overboiling ruins the crispness and flavor.
-
Finishing
- Rapidly cool the boiled ginger with a hand fan, then gently squeeze out excess moisture with your hands (rubber gloves recommended) once cool. Do not squeeze too hard.
-
Storage
- Sterilizing the jar is unnecessary if consumed within a month. Place the pink tips at the bottom, pour in the vinegar, and add the ginger while loosening the slices.
-
Coloring
- Do not discard the pink tips of the young ginger; they react with the sweet vinegar to naturally dye the entire batch a beautiful pink.
Ingredients for "Pickled Young Ginger (Gari)"
7 items* Tap ingredient names to find on Amazon
How to Make "Pickled Young Ginger (Gari)"
- 1
[Make the sweet vinegar] Lightly moisten the kombu with water, then place it in a pot (enamel pot or non-stick pan).
- 2
Add 100ml water, 100ml vinegar, 4 tbsp sugar, and 2/3 tsp salt. Stir well, bring to a rolling boil over medium heat, then turn off the heat.
- 3
Let the sweet vinegar cool completely (if in a hurry, transfer to another bowl and cool rapidly over ice water).
- 4
[Prep the ginger] Cut off the pink tips of the young ginger and set them aside to use for natural coloring.
- 5
Gently scrape the surface of the ginger with a spoon (or a thin metal spoon) to peel off the skin.
- 6
[Slice] Thinly slice the ginger parallel to the fibers using a mandoline slicer (as it gets smaller, hold it down with your fingernails to slice safely; slice any remaining ends with a flat knife).
- 7
[Boil] Bring about 600ml of water to a boil in a pot. Add the pink tips first and boil for 10 seconds.
- 8
Add all the sliced ginger and boil for 20 to 30 seconds while gently separating the slices with chopsticks. As soon as they become slightly translucent, drain them in a colander.
- 9
[Cool & Drain] Rapidly cool the drained ginger by fanning it with a hand fan. Toss occasionally until it cools down to a touchable temperature.
- 10
Once cooled, gently squeeze out excess moisture with your hands (wearing rubber gloves is recommended). Do not squeeze too hard.
- 11
[Pickle] Place the pink tips at the bottom of a clean jar and pour in the cooled sweet vinegar.
- 12
Add the ginger to the jar while loosening the slices, cover with a lid, and let it sit at room temperature for 24 hours.
- 13
It is ready to eat after 1 day. The flavor will mellow and blend even better after 3 days. Store in the refrigerator.
Detailed Commentary on "Pickled Young Ginger (Gari)"
* Content organized by topics from the video.
Preparing the Sweet Vinegar with Kombu Umami
First, we will prepare the sweet vinegar base for our gari. You will need 5cm of dashi kombu, 100ml of vinegar, 100ml of water, 4 tbsp of sugar, and 2/3 tsp of salt. Lightly moisten the dashi kombu with water before putting it in the pot, as this helps extract its rich umami. Next, add the vinegar, water, sugar, and salt, and stir them together. The best part of making homemade gari is that you can adjust the sweetness and acidity to your liking. This recipe uses a golden ratio of pickling liquid perfectly portioned to fill one jar for 200g of young ginger. With such simple ingredients, the subtle depth of the kombu dashi shines through, creating an authentic, deep flavor just like the ginger served at high-end sushi restaurants.
Choosing the Right Pot & Boiling the Vinegar
Once the ingredients are combined, bring the sweet vinegar to a boil. We are using an enamel pot today, and there is an important reason for this. Vinegar is highly acidic, which can damage standard metal pots. If you do not have an enamel pot, a non-stick (Teflon-coated) pan is a great alternative. Once the mixture comes to a full boil, turn off the heat immediately and let it cool. Letting it cool to room temperature is crucial; pickling the ginger while the liquid is still hot will ruin its crisp texture. If you are in a hurry, you can transfer the sweet vinegar to another bowl and cool it rapidly over ice water. Cooling it thoroughly ensures the ginger retains its wonderfully crisp and crunchy bite.
Prep: Easy Peeling with a Spoon
We will use 200g of young ginger. Available from early to mid-summer, young ginger is juicier, milder in heat, and has softer fibers than mature ginger, making it perfect for gari. First, cut off the pink tips. Although these parts are slightly tough and hard to eat, they play a crucial role in naturally coloring the gari a beautiful pink, so do not discard them. Next, peel the ginger. Using a knife often removes too much flesh, so the professional secret is to use a spoon. Simply scrape the surface gently with the edge of a spoon, and the thin skin will come off incredibly easily. A thin metal spoon or a Chinese soup spoon makes this even easier, allowing you to easily scrape around any small bumps.
Slicing with the Grain & Mandoline Safety
Now, we will thinly slice the peeled young ginger. The direction of slicing is key here. If you cut across the grain, the texture will become rough and unpleasant to eat. Therefore, the golden rule for making gari is to slice parallel to the fibers (with the grain). Since slicing paper-thin with a knife takes time and skill, using a mandoline slicer is highly recommended for ease. When using a mandoline, keep the flat side of the ginger facing you and push it forward while anchoring your thumb for stability. As the ginger gets smaller, press down on it with your index fingernail to keep your fingers safe from the blade. For any remaining small ends, lay your knife flat and slide it horizontally to get paper-thin slices.
Quick Blanching to Balance Heat and Texture
Next, we will blanch the sliced young ginger. Prepare about 600ml of water, which is roughly three times the weight of the ginger. Before boiling, set up a tray and a colander nearby to make the process smooth. First, add the reserved pink tips to the boiling water and blanch for 10 seconds. Then, add all the sliced ginger. Since the slices tend to stick together, gently loosen them with chopsticks as they boil. The boiling time is just 20 to 30 seconds. Overboiling will ruin the crisp texture and wash away the flavor, so think of it as a quick blanch. As soon as the ginger becomes slightly translucent, drain it immediately. This brief heating removes harsh bitterness and excess heat while preserving a pleasant spiciness and refreshing aroma.
Finishing & Storing: Natural Pink in 1 Day
Once drained, rapidly cool the ginger by fanning it with a hand fan. Once the top layer cools, toss it to cool the rest until it is comfortable to touch. Gently squeeze out the excess moisture with your hands. For hygiene, wearing kitchen rubber gloves is highly recommended. There is no need to squeeze it aggressively; a gentle squeeze to remove excess water is enough. Removing this moisture prevents the pickling liquid from diluting and extends its shelf life. Next, place the pink tips at the bottom of a clean jar and pour in the cooled sweet vinegar. Add the ginger while loosening the slices. If you plan to eat it within a month, sterilizing the jar by boiling is unnecessary due to the natural preservative properties of vinegar. Simply seal the lid and let it sit at room temperature for 24 hours; the ginger will react with the vinegar and naturally turn a beautiful pink.
Tasting and Enjoying Your Homemade Gari
Let's taste the gari after 24 hours of pickling. On the first day, the heat is still slightly sharp, but you can enjoy the fresh, vibrant aroma of young ginger and an incredibly crisp texture. The balance of acidity from the vinegar and sweetness from the sugar is spot on, tasting just like authentic sushi restaurant gari. It reaches its peak flavor from the second or third day, as the heat mellows and the flavors meld together. Having this homemade gari in your fridge elevates your daily meals. It is perfect not only as a side for sushi and sashimi, but also as a palate cleanser, a quick snack, or a refreshing accompaniment to rich meat dishes like yakiniku. It keeps in the refrigerator for several months, so be sure to make a batch when young ginger is in season.
About きじまごはん 【料理家きじまりゅうた公式チャンネル】

きじまごはん 【料理家きじまりゅうた公式チャンネル】
14.7万人 subscribers ・ 家庭料理
* Opens YouTube channel
* Subscriber count is as of article creation and may differ from the current number.
