

Recipe
The Ultimate Guide: Secret Yakitori Techniques from a Master Chef
Ingredients
- TambaKurodori chicken thighs (or high-quality chicken thighs), to taste
- Tokyonegi (scallions), to taste
- Salt,a pinch
- Sake,a splash
- Vinegar,a splash
About "Negima (Chicken and Scallion Yakitori)"
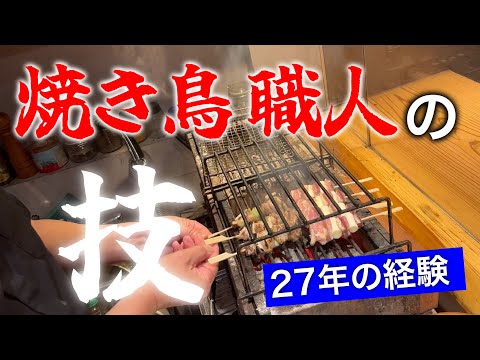
In this video, Yakitori master Chef Noami shares his secret Negima recipe built on 27 years of experience. Using premium Tamba Kurodori chicken thighs and scallions, he demonstrates professional prep techniques like cutting from the skin side, crushing scallion fibers, and effortless skewering. By utilizing the reflected heat of Kishu Binchotan charcoal and the reposer method (alternating grilling and resting), the juices are perfectly locked in to create the ultimate yakitori.
Introduction to 【野乃鳥】野網厚詞の鳥、まるごと。 →
Tips for Making "Negima (Chicken and Scallion Yakitori)"
-
Prep
- Cutting thigh meat from the skin side ensures uniform width, making skewering much smoother.
-
Prep
- Squeezing the scallions to crush their fibers before skewering prevents splitting and allows for clean threading.
-
Skewering
- Ensure the chicken's fatty skin touches the scallions so the melting fat infuses them with flavor during grilling.
-
Heat Control
- Use the high-heat zone at the back of the grill to quickly sear the surface and seal in the umami.
-
Grilling
- Alternate between grilling and resting (reposer) to perfectly lock in the juices.
-
Seasoning
- Never tap or press the meat while grilling; handle gently to prevent juices from escaping.
Ingredients for "Negima (Chicken and Scallion Yakitori)"
5 items* Tap ingredient names to find on Amazon
How to Make "Negima (Chicken and Scallion Yakitori)"
- 1
Separating the Chicken Oyster
Cut away the "tori-toro" (chicken oyster), a rare, round, and juicy cut found on the back side of the thigh, and set it aside to make a separate skewer. This cut is highly marbled and extremely juicy.
- 2
Cutting the Thigh Meat
Pat the meat dry with a paper towel. Place it skin-side up, insert the knife straight down, and cut into uniform 3 cm pieces. Sorting the cut meat into "large" and "small" piles will make skewering much more efficient.
- 3
Prepping the Scallions
If using the green parts of the scallions, wash them thoroughly to remove any sand. Trim off the ends and cut them into 3 cm pieces, matching the size of the meat. Before skewering, gently squeeze the scallions with your fingers to crush the fibers.
- 4
Preparing to Skewer
Hold the flat handle of the gun-shaped skewer (teppo-gushi) just below the center of your palm, securing it between your index and middle fingers. This grip prevents strain on your wrist and elbow, protecting you from tendonitis.
- 5
Skewering the Chicken and Scallions
Thread a "small meat" piece at the bottom, followed by a scallion, a medium meat piece, another scallion, and finally a "large meat" piece at the top, making the skewer taper outward toward the tip. Ensure the fatty skin of the chicken touches the scallion at least at one point, and let the tip of the skewer peek out slightly so the ingredients don't slip off when they shrink during cooking.
- 6
Preparing the Grill Grate
Brush vinegar onto the grill grate to prevent the meat from sticking.
- 7
Seasoning the Meat
Spray the patted-dry meat with sake to bring out a subtle sweetness and tenderness, then lightly sprinkle with salt to coat and lock in the umami.
- 8
Searing in the High-Heat Zone
Control the heat of the Kishu Binchotan charcoal and sear the surface quickly in the hottest zone at the back of the grill, where reflected heat is strongest, to create a flavorful crust that seals in the juices.
- 9
Reposer (Letting the Meat Rest)
After searing, rest the skewers on the upper rack of the grill to let the residual heat cook them through. Alternating between "grilling" and "resting" (reposer) perfectly locks in the juices.
- 10
Finishing Touches
Sprinkle with a final pinch of salt and grill until fragrant and golden brown. When serving, handle the cooked yakitori gently without tapping or shaking it, keeping all the delicious juices inside.
Food Science
Combining the inosinate in chicken with the glutamate in scallions creates a powerful umami synergy. Additionally, applying salt, sake, and vinegar enhances the meat's water-holding capacity, keeping it incredibly juicy. Grilling over an open flame also triggers the Maillard reaction, drawing out a distinct, savory aroma and rich flavor.
Detailed Commentary on "Negima (Chicken and Scallion Yakitori)"
* Content organized by topics from the video.
Secret Negima: 27 Years of Experience
Chef Noami, the representative of "Nonotory" with 27 years of experience running yakitori restaurants, reveals his secret techniques. In this video, he generously shares the ultimate secrets to skewering and grilling the classic "Negima." The process begins with ingredient prep, using premium Tamba Kurodori chicken thighs and Tokyo negi (scallions). When prepping the thighs, he first separates the tori-toro (chicken oyster)—a rare, round cut on the back side of the chicken. Because this part is incredibly marbled and juicy, it is set aside to be skewered separately as a rare delicacy. Professional prep goes beyond simply cutting meat; it starts with identifying the unique characteristics of each cut and shaping them perfectly. This meticulous craftsmanship is what defines the final flavor of the yakitori.
The Secret to Even Cuts: Skin-Side Up
A crucial tip when cutting chicken thighs is to always insert the knife from the skin side. Depending on how sharp your knife is, the skin can slip and be difficult to cut, but placing the skin-side up and slicing straight down ensures a uniform width. This makes the subsequent skewering process incredibly smooth. Aim for a width of about 3 cm. Additionally, thoroughly patting the meat dry with a paper towel before cutting is essential for both ease of slicing and preserving flavor. Sorting the cut meat into "large" and "small" piles also boosts efficiency, ensuring you never mix up the skewering order. This is a professional tip you can easily replicate at home for beautifully prepped skewers.
Prepping Scallions to Prevent Splitting
Next is prepping the Tokyo negi (scallions). While the green parts are typically trimmed off, if you do use them, be sure to wash them thoroughly as sand can get trapped inside. Trim off the unusable ends and cut the scallions into 3 cm pieces to match the meat. A handy pro-tip for measuring 3 cm is to use the length of your finger joint. If you try to skewer scallions as they are, they often split along the fibers. To prevent this, gently squeeze the scallions with your fingers to crush the fibers before skewering. This simple step makes them pliable and prevents splitting, allowing you to thread them beautifully.
The Art of Effortless, Beautiful Skewering
Now, it's time for skewering. Using teppo-gushi (gun-shaped skewers), there is a professional grip that allows you to skewer straight without applying unnecessary force. Position the flat handle of the skewer slightly below the center of your palm, pinch it between your index and middle fingers, and push straight down toward the cutting board. This technique prevents strain on your wrist and elbow, protecting you from tendonitis. Thread the ingredients starting with a "small meat" piece at the bottom, followed by a scallion, a medium meat piece, another scallion, and finally a "large meat" piece at the top, tapering outward toward the tip. This is because the heat is strongest at the tip of the grill. Additionally, make sure the fatty skin of the chicken touches the scallion at least at one point; as it grills, the melting fat will seep into the scallion, making it incredibly flavorful. Finally, let the tip of the skewer peek out slightly so the ingredients don't slip off as they shrink.
The Science of Charcoal Grilling and Heat
In the grilling process, we control the heat of Kishu Binchotan charcoal. The coals are lit bright red at the edges, creating an upward draft of heat. Since the back of the grill is enclosed by glass and a wall, the reflected heat makes the back area the hottest. The front has no wall, allowing heat to escape, and we utilize this temperature gradient to grill. First, brush vinegar onto the grate to prevent the meat from sticking. Next, spray the patted-dry meat with sake to bring out a subtle sweetness and tenderness, and lightly sprinkle with salt as a coating to lock in the umami. Start by searing the surface quickly in the high-heat zone at the back to create a flavorful crust, then rest the skewers on the upper rack to let the residual heat cook them through—a process called reposer. Alternating between "grilling" and "resting" perfectly locks in the juices.
The Explosion of Juices and Rich Aromas
When grilling yakitori, the absolute golden rule is to never tap or press the meat. Doing so will release the precious juices and umami you worked so hard to seal in, so handling them gently is key. Finish with a final sprinkle of salt and grill until fragrant. Because the ingredients were packed tightly toward the tip, the chicken plumps up beautifully during grilling, resulting in an incredibly juicy texture. With your first bite, the crispy, fragrant exterior, the rich juices bursting from within, and the sweetness of the scallions infused with chicken fat harmonize perfectly. High-quality chicken leaves a pleasant, lingering aroma long after you finish eating. This ultimate yakitori pairs beautifully with sake or your favorite drink, offering a sublime culinary experience.
About 【野乃鳥】野網厚詞の鳥、まるごと。
【野乃鳥】野網厚詞の鳥、まるごと。
7,210人 subscribers ・ 焼き鳥
* Opens YouTube channel
* Subscriber count is as of article creation and may differ from the current number.
